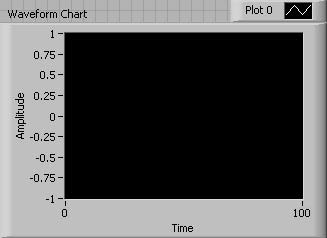
Waveform Charts provide a historical graphical representation of numeric data.
The following example will build a simple G program that will allow you to chart a sine wave as it is being generated on a point-by-point basis using the equation:
yi = sin (0.2xi) (9.1)
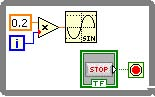
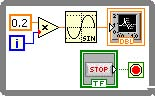
Start with a while loop and add into it a Multiply and Sine functions, a numeric constant with value 0.2 and a Boolean control to stop the loop when its value is True. Arrange the diagram to look as in the following Figure Figure 7.2.
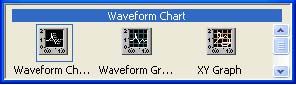
To select a waveform chart, right click on the Front Panel window and select Waveform Chart from the Controls »Modern »Graph menu.
This places the Waveform Chart in the Front Panel window.
In the Block Diagram window, make sure that the Waveform Chart terminal is inside the while loop. Wire the output of the Sine function to this terminal.
Notice that Waveform Chart terminal is that of a numeric output.
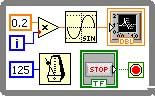
Most modern computers will run this program too fast. Thus, before this program is executed, a delay of 125 milliseconds will be inserted in the while loop. This will allow users to see how the Waveform Chart operates as data samples are plotted in the chard.
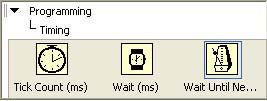
From theFunctions »Programming »Timing selectWait Until Next ms Multiple. This will put the while loop to sleep for the indicated number of milliseconds.
Drop the Wait Until Next ms Multiple function inside the loop and wire a constant to it with the value
125. This will delay the loop for 125 milliseconds. The final Waveform Chart program is shown in Figure Waveform Chart Program.
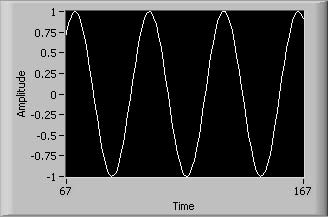
The default graphing mode of the Waveform Chart is autoscaling. You will notice the auto-scaling property when the program frst begins to run and the y-axis, labeled Amplitude, updates automatically as new numerical values are aggregated and displayed on the chart.
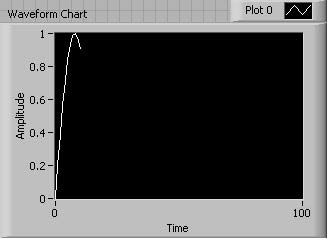
As the program continues to run, the graph continues to build as per the values associated with the x-axis, labeled Time, which correspond to the index value of the equations.
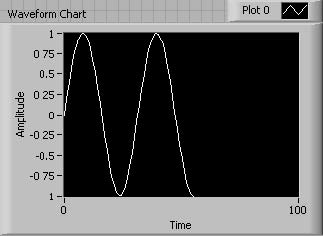
As the program continues to run, the autoscaling property also applies to the x-axis. Noticed the updated x-axis. For this example, the x-axis will continue updating so as long as the program is running. This gives the appearance of a scrolling strip chart.
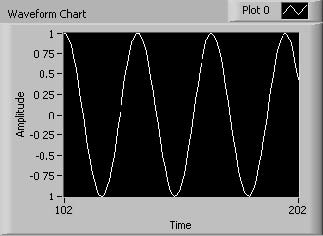
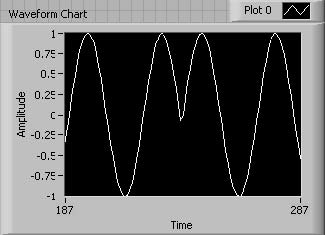
Stopping and restarting the G program retains the numeric history and continues to aggregate the values for display.
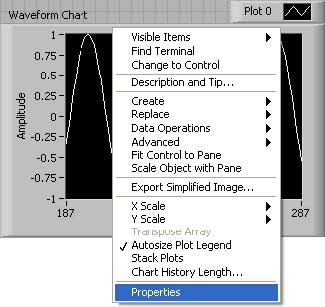
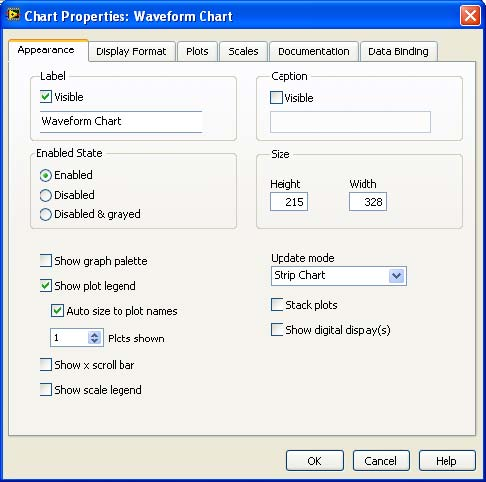
The Waveform Chart options can be easily updated by right clicking on the Waveform Chart and selecting the appropriate option to update from the pop-up menu.
Selecting Properties from this pop-up menu brings up the Waveform Chart dialog window (Figure Figure 7.14).
- 瀏覽次數:3005